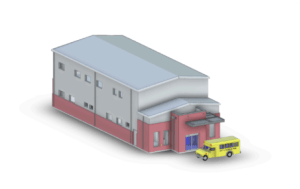
Reinforced Roofs: Structural Retrofits for Solar Panel Installation
Objective: Help building owners, facility managers, and structural engineers understand how to strengthen roofs for reliable solar panel installation.
Target Audience: Commercial and industrial property owners, structural engineers, architects, and solar contractors planning rooftop photovoltaic (PV) systems.
Desired Action: Encourage readers to perform proper structural assessments, engage qualified engineers, and implement effective retrofit solutions to support solar arrays safely and efficiently.
Introduction
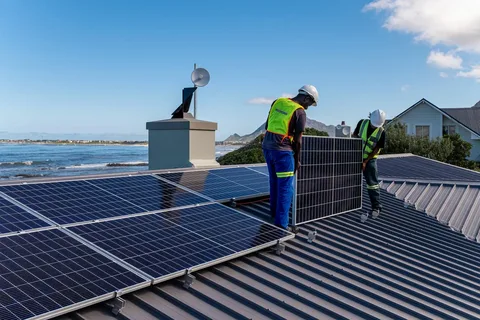
Rooftop solar is an attractive way to reduce energy bills and environmental impact. However, many existing roofs lack the necessary capacity for PV arrays. Structural retrofits for solar panel installation are often needed to prevent excessive deflection, roof failure, or code violations. By understanding how reinforced roofs work—and why they’re necessary—you can avoid costly surprises and ensure your solar project proceeds smoothly. In this blog, we’ll explain the process of evaluating an existing roof, calculating additional loads, selecting retrofit methods, and meeting code requirements. Let’s dive into the key steps you need to know before mounting solar panels on your roof.
1. Assessing the Existing Roof Structure
Why It Matters
Before you design a solar array, you must determine if your roof can carry added weight. Many buildings built before 2010 were not designed with PV loads in mind. If you skip this assessment, you risk roof sag, structural damage, or catastrophic failure.
How to Conduct a Structural Evaluation
- Review Original Building Plans: Check design drawings or structural reports for roof framing details, material strengths, and load capacities.
- Perform On‐Site Inspections: A qualified structural engineer should inspect roof framing members—such as joists, rafters, purlins, or trusses—for damage, corrosion, or rot.
- Non‐Destructive Testing (NDT): Use techniques like ultrasonic testing or moisture probes to verify wood or steel integrity without removing finishes.
- Document Roof Geometry: Measure span lengths, member sizes, and existing roof sheathing. This data is crucial for load calculations.
By thoroughly assessing existing conditions, you’ll identify weak points and set the stage for an effective retrofit.
2. Calculating Additional Loads for Solar Arrays
Why It Matters
Solar panels, racking, and ballast systems can add 3–5 pounds per square foot (psf) of dead load. In some cases, wind uplift and snow loads also increase. Underestimating these forces can result in under‐designed framing or overloaded roof diaphragms.
Load Calculation Steps
- Determine Dead Load Increases: Calculate the weight of modules (typically 2–3 psf) plus racking or ballast (up to 2 psf). Include fasteners and attachment brackets.
- Assess Live Load and Snow Load Changes: In snowy climates, adding PV can trap snow, increasing roof snow load. Evaluate whether the solar array changes snow shedding patterns.
- Evaluate Wind Uplift: Solar racks can catch wind. Use ASCE 7 wind maps and Local Building Codes to compute uplift pressures.
- Combine Loads with Building Codes: Follow the American Society of Civil Engineers (ASCE 7) load combination formulas. For example, 1.2 × Dead Load + 1.6 × Snow Load + 0.5 × Live Load.
After load calculations, compare results to original design capacities. If the new combined loads exceed allowable stresses, a retrofit is required.
3. Selecting the Right Solar Panel Retrofit Methods
Why It Matters
Selecting the right solar panel retrofits ensures safety and long-term durability. Common methods include adding support beams, reinforcing existing joists, or installing additional columns. Each approach has trade‐offs in cost, construction time, and impact on occupied spaces.
Typical Retrofit Options
- Sistering Joists or Rafters: Attach new, identical members alongside existing framing. This doubles section modulus, increasing moment capacity.
- Pros: Simple, cost-effective for minor capacity increases.
- Cons: Limited to accessible areas with room to add members.
- Installing Steel Beams or Trusses: Add new primary support members under the roof structure. For example, adding a W8×35 steel beam under purlins.
- Pros: Suitable for larger spans or significant load increases.
- Cons: Requires careful coordination with existing columns and foundations.
- Strengthening Roof Diaphragm: Increase shear capacity by adding plywood or oriented strand board (OSB) sheathing and nailing per code.
- Pros: Improves overall lateral stability and distributes solar loads more evenly.
- Cons: May require plywood removal and replacement—disruptive if occupancy is ongoing.
- Using Ballasted Racking with Minimal Penetrations: For roofs that cannot bear high point loads, ballasted systems transfer weight over a wider area.
- Pros: Avoids roof penetrations in some cases.
- Cons: Requires ballast—and thus additional weight—so evaluate carefully.
Choose a retrofit method based on the magnitude of deficiency, building use, budget, and installation timeline.
4. Material Selection and Detailing
Why It Matters
Selecting the right materials and detailing connections ensures long‐term performance. Improper fasteners, incompatible materials, or inadequate corrosion protection can compromise the retrofit.
Best Practices for Materials and Connections
- Use Proper Fasteners and Connectors: Steel beam connections should use high‐strength bolts (A325 or A490) with hardened washers. For wood framing, use code‐rated joist hangers and hurricane ties.
- Specify Corrosion‐Resistant Materials: In coastal or humid environments, specify stainless steel anchors, galvanized steel beams, or zinc‐coated joist hangers to resist rust.
- Detail Load‐Transfer Paths Clearly: Show how panel racking loads transfer from modules to rails to roof members. Indicate bearing pads, flashing modifications, and sealants.
- Integrate Waterproofing Details: Any roof penetrations for racking attachments must be flashed and sealed per manufacturer instructions. For example, use butyl rubber gaskets under standoffs.
Well‐detailed drawings minimize onsite confusion, reduce change orders, and protect the building envelope.
5. Code Compliance and Permits for Solar Panel Retrofits
Why It Matters
Structural retrofits and solar installations both require permits. Without proper documentation and code compliance, you may face citations or forced removal of equipment. Understanding local building department requirements and solar‐specific codes is essential.
Permitting and Code Steps
- Engage a Licensed Structural Engineer: Submit stamped retrofit drawings that show analysis, calculations, and details. Some jurisdictions require third‐party review for solar retrofits.
- Obtain Building Permits: Provide complete sets of structural and electrical plans. Ensure solar PV electrical wiring meets National Electrical Code (NEC) Article 690.
- Meet Wind and Seismic Requirements: Many areas require wind uplift tests or seismic bracing per ASCE 7. Show hold‐down anchors and diagonal bracing details if required.
- Coordinate with Fire Departments and Utilities: Indicate clear access pathways for firefighting. Provide utility interconnection documents for inspection. Some local codes mandate shut‐off signage and rapid‐shutdown devices.
By addressing permit requirements early, you avoid plan check delays and accelerate construction.
Conclusion
Reinforced roofs are not just “nice to have”—they’re critical for safe, long‐lasting solar installations. Structural retrofits for solar panel installation ensure that your roof can handle added dead loads, wind uplift, and snow accumulations without distress. By thoroughly assessing the existing structure, calculating new loads, selecting appropriate retrofit methods, detailing materials carefully, and obtaining all necessary permits, you protect your investment and prevent future failures.
In conclusion, if you’re planning a rooftop solar project and need reliable retrofit solutions, work with experienced structural engineers. When it comes to structural retrofits for solar panel installation, precision and experience matter. At GDI Engineering Design’s Structural Services, our team specializes in evaluating existing roofs and designing cost‐effective reinforcement plans. Contact us today to ensure your solar array is supported by a roof built to last.
Internal Links
- Learn more about our full Structural Engineering Services.
- Read about successful solar retrofit projects in our Case Study: Warehouse Solar Retrofit.
External Links
- Review ASCE 7 for structural load requirements: ASCE 7 – Minimum Design Loads.
- Reference the International Building Code (IBC) for retrofit standards: ICC – IBC Code.
Ready to reinforce your roof for solar? Contact GDI Engineering Design to schedule a structural assessment and get your retrofit plan in motion.

